Wednesday, January 21, 2015

Update and Homemade Ramen Noodle Recipe

Tonkotsu pork ramen topped with chashu pork and mayu, a black garlic oil

Hi everyone! I apologize for my long hiatus. I've been posting occasionally on kaoricooks.com, but realized that my heart is really with this blog, my original baby.

I'm now student teaching as a high school English teacher! That, and juggling cooking classes and testing ramen recipes for a Japanese restaurant. So, I won't be blogging often, but after a friend today commented on one of my posts, I realized that I miss blogging, miss writing about food, and miss inundating y'all with tasty food pictures! And, I realized that people actually read my blog! Hooray!! If you keep these comments going, then I will keep the posts going ;)!

I'm pretty psyched about testing out ramen recipes. Right now my main task is Tonkotsu Ramen, and I'm getting there, with the help of a wonderful friend. This last monday I finally achieved the milky color and consistency I was aiming for! VICTORY. But not yet, the flavor's gotta be there too.

I'm enjoying student teaching- 3 freshmen classes and 2 junior/senior classes. Teaching is actually a lot of work!! And most of it goes into planning a lesson, making hand outs, and grading. You really do not know what your teachers went through to educate you, until you step into their shoes. I am eternally grateful. I hope I can be one of those teachers that students remember in the future :) and think on fondly.

Ok, now it's time to expose you to another slew of food pictures, and down below you will find a delicious homemade ramen noodles recipe, way better than any store-bought noodles!!!! I mean it.

Here are some pictures of recent ramen-makings and ramen classes. Enjoy!

Shoyu Ramen! Picture by good friend and photographer Shino Takahashi (shinotakahashi.com)

A fresh batch of homemade ramen noodles! Ready for the boil!


Shoyu ramen, influenced from Momofuku recipe

My mom's Shoyu Ramen recipe, passed down from my grandmother


The Shin Yokohama Raumen Museum in Japan

More fresh ramen noodles

Ingredients for a ramen class I taught

SLURP

Product of the first ramen class I taught


Homemade Ramen Noodles Recipe
(from Chef Marc’s Norecipes.com)

Ramen Noodles:
Ingredients:
Noodles: 
(makes enough noodles for 4 bowls)
300 grams bread flour (about 2 cups)
1/2 cup warm water
1 teaspoon Koon Chun Potassium Carbonate & Sodium Bi-Carbonate (kansui)

Method:
  • Make the noodles. Combine the kansui and warm water. Place kansui-water mixture and flour into a standing mixer with a paddle attachment and mix on low for 5 minutes
  • Knead dough by hand for several minutes and then let rest
  • Flatten noodles with an attachment or hand-crank to the “4” setting, or however thick you would like it.
  • Or use a rolling pin to roll until very thin
  • using spaghetti pasta cutter attachment, slice dough into noodles, or cut by hand, and cook in boiling water until they float to the top
  • Drain noodles under cold water
  • Place noodles in a bowl and fill with ramen broth. Finish off the bowl with ramen toppings, i.e. chashu pork (I have a recipe for this, too!), sliced green onions, naruto fish cake, etc...

Wednesday, November 19, 2014

Homemade Delicious and Easy Korean Bulgogi!


I recently got this delicious bulgogi (Korean seasoned beef dish) recipe from an older Korean woman in my community. This recipe is so super easy, and makes eating bulgogi more affordable :). No longer will I buy bulgogi-seasoned meat from Korean stores, I can make it myself! This easiness and tastiness of this dish really surprised me, and it will surprise you too!

Bulgogi Recipe:

Ingredients:
-2 lbs beef chuck or rump roast (I used sirloin, but any cut of meat should work. Try to get a piece of beef without too many fat or cartilage veins in it)
-1/2 cup soy sauce
-1/2 cup water
-5 green onions, chopped into 2 inch pieces
-1/4 cup vegetable oil
-1/2 cup sugar (or more depending on how sweet you like it)
-7 garlic cloves
-1 onion, thinly sliced

Method:
1. Cut the beef into thin slices with a kitchen knife, as thin as you can (don't worry if it's not perfect, it'll still taste good)

2. Crush garlic cloves with side of a knife to remove skin. Chop each clove into small pieces and then mush the garlic against the cutting board with the side of a kitchen knife until it looks more translucent then before. This helps release flavor from the garlic in order to season the meat. Don't worry about having garlicky smelling hands, it's part of the fun!

3. Combine the oil, sugar, water, soy sauce, and minced/smashed garlic, sliced green onion and sliced regular onion with the sliced meat in a bowl. Mix to coat meat. Marinate for 2-3 hours or even overnight.

4. After marinating the meat, heat a pan to high. Put all of the beef and marinade into the pan and cook quickly. Remove the meat and marinade from the pan immediately after meat is done.

5. Enjoy with rice and pickled vegetables or kimchee.


Wednesday, July 16, 2014

Delicious Mulberry Scones!

picture by Shino Takahashi

Mulberries are everywhere in Ohio during the summertime, and the particular mulberries I used for this recipe were from the parking lot of my apartment. With my graduate summer M.Ed classes in full swing, and actually, soon ending in 2 weeks, I need a recipe to fall back on for easy, quick breakfasts on summer mornings, something crumbly and scrumptious to eat while sipping my morning English tea. And what better to eat than fresh, buttery scones made with whipping cream and hand-picked mulberries from the backyard?

Fresh summer mulberry scone with a side of whipped cream


These lovely photos are all taken by my very talented friend Shino Takahashi! Check out her website to see more of her amazing portfolio at shinotakahashi.com
Cooking is just so tiring....not! :P

Ingredients! from left to right: whipping cream, mulberries, lemon zest, butter, salt, sugar, and flour + baking soda in the middle


cutting the butter into the flour


Mulberry Scones 
(any other berries can be substituted)
*adapted from this recipe on chow.com

Ingredients:
  • 2 cups all-purpose flour, plus more as needed
  • 1/4 cup plus 1 tablespoon granulated sugar
  • 2 1/2 teaspoons baking powder
  • 1 teaspoon grated lemon zest (from 1 medium lemon)
  • 1/2 teaspoon fine salt
  • 8 tablespoons unsalted butter (1 stick), cut into 1/2-inch cubes and then chilled
  • 3/4 cup plus 1 tablespoon heavy cream
  • 1 cup fresh or frozen berries
Method:

1. Preheat oven to 400 degrees

2. Mix together flour, baking powder, sugar and salt in a bowl

3. Cut the butter into one inch cubes and then cut the butter cubes into the flour with two knives, just like you do when making pie crust dough. Dough should start to look like little pebbles. 

4. Pour the whipping cream into the dough and continue mixing with a spatula for another minute or so. Lightly mix the berries into the dough. Be gentle so that the berries don't get too crushed.

5. Place 1/2 cup mounds of the scone dough onto parchment paper on a baking sheet (you can also oil the baking sheet instead)

6. Sprinkle a 1/4 teaspoon of sugar on top of each scone (optional). Bake until golden brown on top, about 20 minutes. 

7. Enjoy! :)
_________________________________________________________________________________

From my kitchen to yours, 

Kaori <3

Please subscribe to my blog today!


Thursday, June 19, 2014

Tacos at Los Tizoncitos

Al Pastor Tacos are marinated in a combination of dried chiles, spices and pineapple and then roasted on a vertical rotisserie, shawarma-style (information from Wikipedia)

Some moments are better left untouched, whole, and spontaneous, and one of those moments was tonight on my stroll to Los Tizoncitos, a taco truck down the road. A few minutes prior to my decision to suddenly walk out of my apartment with just my keys, phone, and some coins to buy tacos, I had started to feel restless, like I needed something to fire me up. Today I just finished my first week of graduate school, and boy, what a week it was. I had just finished a wonderful vacation to Boston, Massachusetts with two dear childhood friends the day before, and I thought I had some time to relax because classes started Wednesday. Wrong! Classes actually started on Monday! I missed my first class, and realized from that point on, that man, I need to take this sh*t seriously (sorry for swearing). But that's really how I felt. I am currently studying in the Masters in Education program at Ohio State University, as part of the English Language Arts Program. Woohoo! I'm finally fulfilling my dream of teaching English! It's exciting, yet daunting, and this first week, with missing class and then realizing the large amount of reading, I got shocked into shape. This is it, one year of life dedicated to trying to become the best teacher I can possibly be. I realized I need to get on court and off of the sidelines of life, and really be present to what is happening for me in my life right now.


Anyways, back to the tacos...cause I know that's all you probably want to know about :P. Just kidding. Where was I? Moments left untouched, oh yes, so I immediately have the inspiration, TACOS TACOS TACOS, grab $3.50 worth of quarters from our coin "vacation fund"(because let's face it, with a huge loan for grad school, I don't feel very rich right now!) and sneakily head out the apartment door. I walk over to Los Tizoncitos from my apartment because it is super close by, embracing the humid and warm air that Ohio currently offers. I almost feel like the air is hugging me, embracing me like lovers do when its time for bed, clinging to me, but not enough to make me sweat and tell it to "back off!". I close my eyes to increase my sense of hearing, and absorb the sounds of crickets, birds, and a lawnmower in the far distance. It smells like summer: warm concrete, earth, and moist air, and a faint smell of freshly cut grass. I walk over to Los Tizoncitos and find the familiar faces of the hispanic husband and wife that own the taco truck. In my broken Spanish, I order "tacos al pastor", and prepare myself for four corn tacos, layered with deliciously marinated pork, a slice of grilled pineapple, chopped cilantro, onions, and salsa. I eat the tacos, relishing every spicy bite, and stroll back towards my apartment. Just as flames of spice engulf my mouth from time to time as I walk away, I see fireflies bursting into one-second explosions, and then flying away. I feel at home. I may be a California girl, but this is a part of Ohio I will always love.

Earlier, I went to Los Tizoncitos with my childhood friend :) photo taken by Shino Takahashi

photo taken by Shino Takahashi

Tacos Chicharron (fried pork skin), photo taken by Shino Takahashi

~~~~~~~~~~~~~~~~~~~~~~~~~~~~~~~~~~~~~~~~~~~~~~
From my kitchen to yours, 

Kaori <3

Please subscribe to my blog today!

Monday, May 26, 2014

Strawberry Custard Phyllo Dough Tart in 30 minutes!


Nothing tastes better than a cream puff custard spread lavishly onto a flaky phyllo dough crust, topped with fresh, macerated strawberries. At least I think so :P. I served this tart at an event for young adults in my church community, and it was practically licked clean within minutes. And the great thing about it is how easy it is to make! From start to finish, this took me around 30 minutes to make. That said, my husband says that I am a really quick cook, but really there is not much work to this dish. 


Custard pastry filling brings me back to fond memories of cream puffs at the Japanese bazaars at our church, served from loving Japanese mothers (even though cream puffs originated in France), fundraising for their club events. I would buy a cream puff for 50 cents and take a little bite of the pastry, soon slurping out the custard and eating the rest of choux pastry in one bite. It's a taste of childhood, a taste of something familiar and comforting.


I recently discovered phyllo dough from a recipe my mother-in-law taught me for Greek spanakopita. Bought from the frozen section of any supermarket, these flaky, super-thin sheets are crispy and lightly buttery. I prefer them to to the thick and crunchy pastry crusts that are usually accompanied with tarts. Phyllo dough is light and flaky, and gives this tart a light feeling when eating it. Macerated strawberries are basically strawberries chopped up, with about a tablespoon of sugar mixed into them, to have them release some strawberry juice.


Strawberry Custard Phyllo Dough Tart
*Custard recipe is from deliciouseveryday.com

Ingredients: 
  • Phyllo Dough (It comes frozen and needs to be defrosted)
  • 1 package strawberries
Vanilla Pastry Cream:
  • 6 egg yolks
  • 150g (2/3 cups) sugar
  • 70g (1/2) cup flour
  • 2 cups milk
  • 2-3 teaspoons vanilla extract 
1. Overlap two layers of phyllo dough sheets at a time at different angles over the pie plate. Use about 14 sheets. 
2. Microwave 2 tablespoons of butter until melted and pour over the phyllo dough sheets in pie plate. Place in oven at 350 degrees. 
3. Put the milk and vanilla extract in a pot and heat on medium heat until just below boiling point. 
4. Separately, use a mixer to mix the sugar, eggs, and flour together until completely combined.
5. After egg-sugar-flour mixture is combined, slowly add the hot milk to the egg-sugar-flour mixture. Gradually whisk the hot milk into egg mixture until all milk has been added and mixture is well combined. Gradually adding milk will minimize risk of eggs curdling. 
6.  Return the mixture to the saucepan over medium heat and cook, whisking constantly until mixture is thickened and glossy. Whisk out any lumps or strain through a mesh sieve if needed. Refrigerate until cool. 
7.  Chop up strawberries and put in bowl. Mix with 1 tablespoon sugar and let it rest until custard has cooled down. 
8. After phyllo dough is a golden brown color, remove from oven and let cool for a few minutes. Pour cooled custard onto phyllo crust, and top the custard with the macerated strawberries. 

Enjoy!!

_________________________________________________________________________________

From my kitchen to yours, 

Kaori <3

Please subscribe to my blog today!


Tuesday, May 13, 2014

Cooking Class 1: Italian Ravioli Class!

I may look like a small, little girl (many students I substitute are in disbelief that I am 25 :P), but I have some big dreams, and one of those dreams (that is becoming a reality) is being a cooking instructor!

So naturally, I was so excited when I could teach my first cooking class in my church community, with beloved friends!


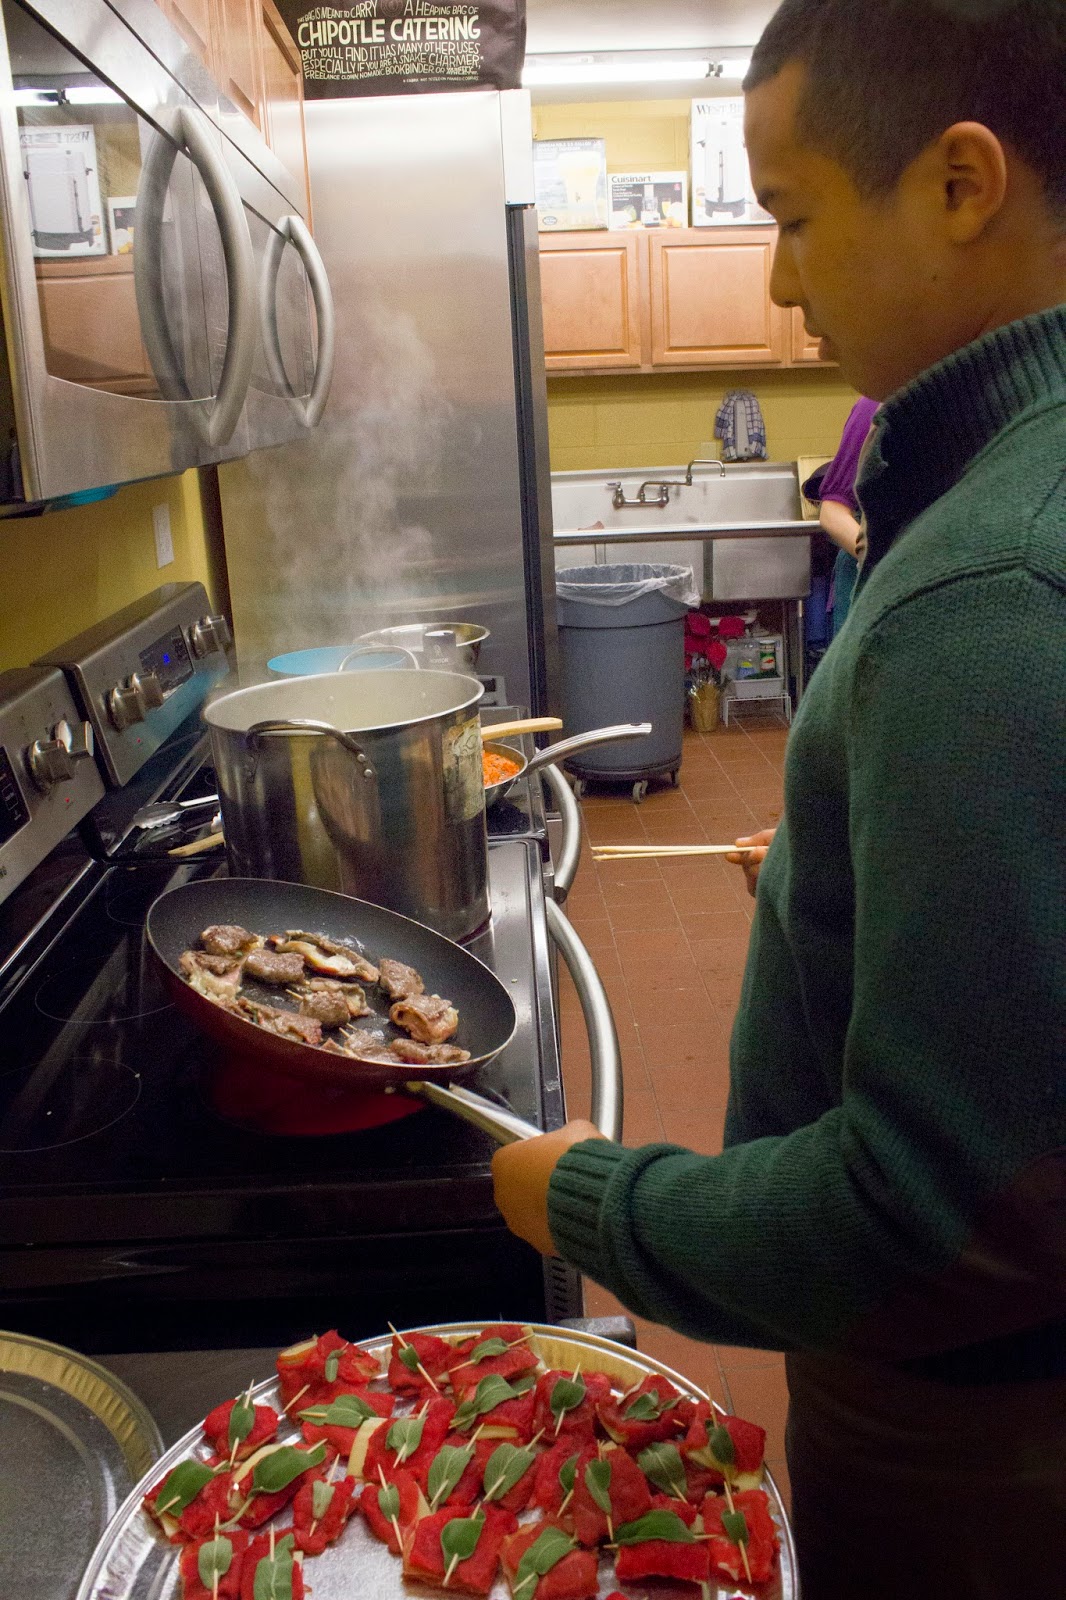
 For this class, we made ravioli with spinach and ricotta, homemade tomato sauce, rosemary and olive oil baked potatoes, spelt salad, and a meat and cheese appetizer called "Saltim Bocca".


Saltim Bocca- "jump in your mouth" morsels made with beef, prosciutto, edam cheese, topped with sage leaf


Delicioso! Thanks friends!